The Awkward Addict

BUY ALL THE MAKEUP!


3 Comments

Too Faced Chocolate Bar Palette Tutorial

Oh loves, it’s been far too long!  If I go without blogging for more than a few days, I get kinda twitchy.  It feels good to be sitting down to write again.  This week has been insane.  For all who were wondering, I survived Black Friday.  Barely.  While I was getting ready this morning, I played around with the idea of putting some war paint beneath my eyes just to let everyone who crossed my path know that I meant business.  Luckily, I only ran into a few crabby customers, and the rest were quite pleasant.  There were far, far too many of them…but at least they were pleasant!  My shift ended with a lady backing into my car in the parking lot.  Fitting for the day, I’d say.

Anyway, I thought I’d show you the eye look I’ve been wearing pretty consistently lately.  Ever since I bought the Chocolate Bar Palette, I haven’t been able to put it down.  For one, it just smells too delicious NOT to use on a regular basis.  Again…Too Faced are geniuses when it comes to marketing products for women.  ::Applause::

Let’s do it!

Chocolate Palette 029First, I primed my face with Pur Mineral’s Miracle Mist.  I can’t get enough of this stuff.  I also primed my lids with Urban Decay’s Eyeshadow Primer Potion.

Chocolate Palette 001Chocolate Palette 031
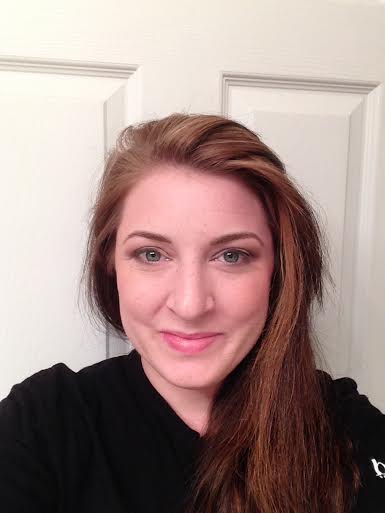
Alright, these pictures are WAY too big.  Sorry you’re getting an up close and personal view of my pores.  Anyway, the next step foundation followed by concealer.  I’ve been using this Cover Girl foundation lately, and I LOVE it.  Again, Cover Girl is the way to go when it comes to inexpensive, drugstore foundations.  The only problem is that I can’t find a shade pale enough for my ghostly white face (#palegirlproblems).  I used my Maybelline Instant Age Rewind Concealer under my eyes and Pur’s Disappearing Act Concealer on my blemishes and discoloration.

Chocolate Palette 006
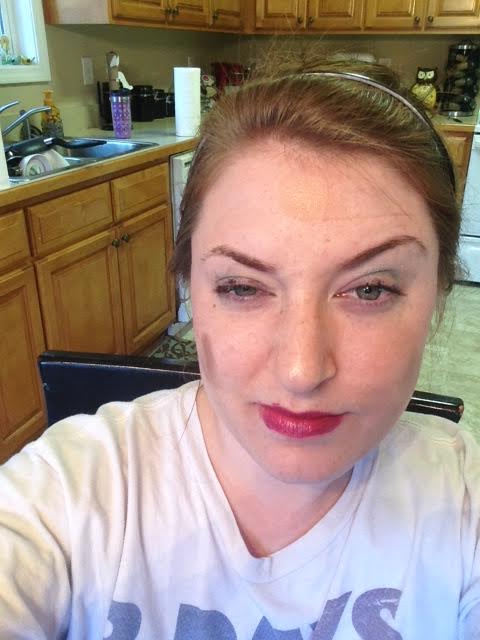
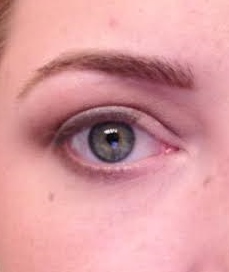
Here’s the eye look halfway done.  Oh, look at my poor, tired, got up at 3:30-to-be-at-work eyes.  ::sigh::  Anyway, keep reading for the breakdown of shadows used.

"White Chocolate" was used on the brow bone.

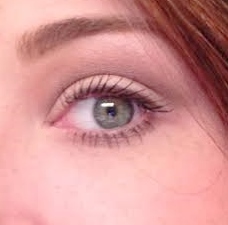
“White Chocolate” was used on the brow bone.

"Creme Brulee" and "Champagne Truffle" were layered the lids.

“Creme Brulee” and “Champagne Truffle” were layered the lids.

You can’t tell, but I’m doing “rawk” fingers here.

"Milk Chocolate" was blended through the crease and applied on the lower lash line.

“Milk Chocolate” was blended through the crease and applied on the lower lash line.

Lorac's Front of the Line Liquid Liner in "black"; Urban Decay's Perversion Mascara; Anastasia Brow Wiz in "Taupe"

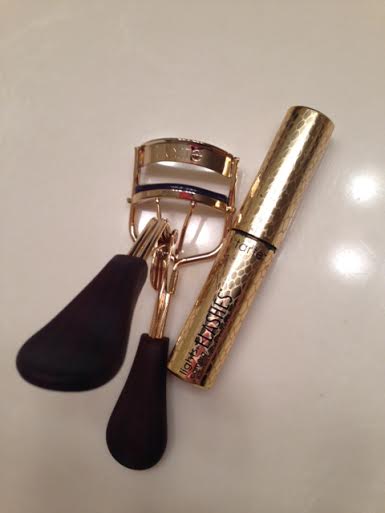
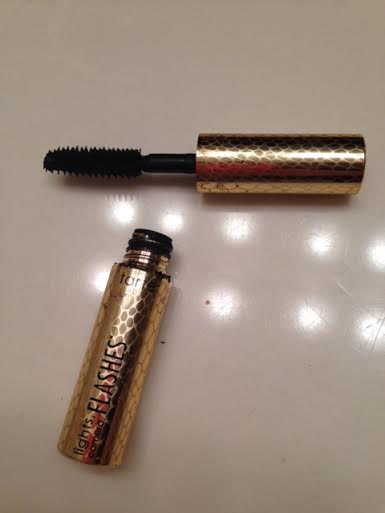
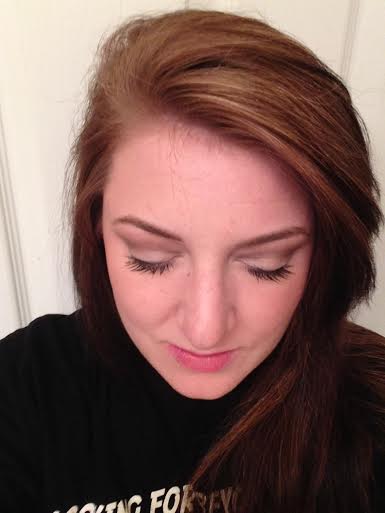
Lorac’s Front of the Line Liquid Liner in “Black”; Urban Decay’s Perversion Mascara; Anastasia Brow Wiz in “Taupe”

These products were used to finish up the eyes.  Have a looks-y.

Chocolate Palette 007
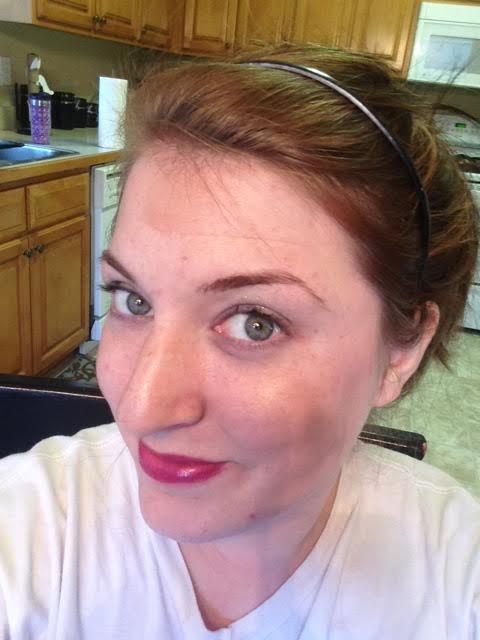
Finally, I applied some blush and added a neutral lip to complete the look.

Tarte Amazonian Clay Blush in "Exposed."

Tarte Amazonian Clay Blush in “Exposed.”  Applied to lower cheekbones and temples.

NYX Waterproof Lip Liner in "Nude." Lorac Lip Gloss in "English Rose."

NYX Waterproof Lip Liner in “Nude.” Lorac Lip Gloss in “English Rose.”

Chocolate Palette 016Chocolate Palette 019Chocolate Palette 020And there we have it!  Now to wash this off and get some much-needed rest.  Enjoy your evenings, Awkward Annies!

Stay Weird!

-Rachel

P.S.- I’ve been nominated for the Liebster Award by two lovely bloggers.  That post coming soon and thanks for the nomination!


5 Comments

All Dressed Up and Nowhere to Go! *One Look/Four Lip Choices*

Good morning!  I hope you’re all having a fabulous start to the weekend!  Today I’m going to show you a neutral eye look with four separate lip choices.  I invited a friend over last night with the promise of a bonfire.  It was all a rouse to corner her into letting me give her a makeover for all of you to enjoy.  Without further ado, here is the beautiful Lauren sans makeup:

Lauren Makeover 009She’s a hottie tottie without anything on her face.  I mean, cheekbones for days!  But watch as we make her extra sassy in the photos to come…

Lauren Makeover 011To even out her (basically already) even skin, we used the following:

L'Oreal Lumi foundation and Pur Disappearing Act concealer.

L’Oreal True Match Lumi foundation and Pur Disappearing Act concealer.  Set with Corn Starch…obviously.

For the eyes, we used Urban Decay’s Naked 2 Pallet, with Smashbox’s Cream Shadow in “Quartz” as a base.  I also used Rimmel’s Lash Accelerator Volumizing Mascara and Anastasia’s Brow Wiz pencil in “Taupe.”

Lauren Makeover 018

Smashbox

Smashbox Limitless 15 Hour Wear Cream Shadow in “Quartz” was applied all over the lid.

Smashbox Limitless 15 Hour Wear Cream Shadow in "Quartz" was applied all over the lid.

Smashbox Limitless 15 Hour Wear Cream Shadow in “Quartz” was applied all over the lid.

Lauren Makeover 046

asdf

“Verve” was applied all over the lid.

"Tease" was blended through the crease and applied on the lower lash line.

“Tease” was blended through the crease and applied on the lower lash line.

"Busted" and "Blackout" were layered over the upper lash line with a small, angled brush.  These were used in place of eyeliner to create a softer eye look.

“Busted” and “Blackout” were layered over the upper lash line with a small, angled brush. These were used in place of eyeliner to create a softer eye look.

Mascara was applied to top and bottom lashes.

Mascara was applied to top and bottom lashes.

We used Anastasia's Brow Wiz pencil in "Taupe" to define and slightly extend her brows.

We used Anastasia’s Brow Wiz pencil in “Taupe” to define and slightly extend her brows.

To finish up the face, we applied blush to her cheekbones and blended it through the temples and hair line.  Because of her fair skin, this was used in place of bronzer to warm up her complexion.

Lauren Makeover 030

Purminerals Universal Marble Powder in "Pink."

Purminerals Universal Marble Powder in “Pink.”

Now on to the fun part!  Check out the lip options for this look:

1. Bright Pink Lip

Lauren Makeover 014 Lauren Makeover 015

Pop Lip Crayon in "

Pop Lip Crayon in “Fuchsia Flirt.”

"Pop Lip Crayon in

Pop Lip Crayon in “Fuchsia Flirt.”

2. Mauve Lip

Lauren Makeover 020 Lauren Makeover 021

Bare Minerals Lip GLoss in "Sugar Plum."

Bare Minerals Lip GLoss in “Sugar Plum.”

3. Nude Lip

Lauren Makeover 030 Lauren Makeover 031

Rimmel Show Off Lip Lacqer in "Nude Eclipse."

Rimmel Show Off Lip Lacquer in “Nude Eclipse.”

Rimmel

Rimmel Show Off Lip Lacquer in “Nude Eclipse.”

4. Red Lip (Favorite)

Lauren Makeover 034

MEOW!

MEOW!

L'Oreal Lipstick in "True Red."

L’Oreal Lipstick in “True Red.”

There you have it!  She rocked all four colors, but the red looked amazing. Thanks to Lauren for loaning me her face for the evening and thanks to all of you for reading!

Stay Weird!

-Rachel


8 Comments

Kylie Jenner Makeup Look

Good evening, lovelies!  Tonight I tried my take on the gorgeous Kylie Jenner’s trademark makeup look: Neutral eyes with a slight wing and full, 90’s-esque lips.  I have a confession to make.  I had no idea who Kylie Jenner was until this year when her face started popping up everywhere in the makeup world.  I never watched any of the zillion Kardashian shows nor did I follow them on any media site.  I do have to say, Kylie is beautiful and I really enjoyed creating this look.  Now for the obvious disclaimer:  I look nothing like Miss Jenner.  I mean….we are literally complete opposites.  So, if you want to see what Kylie’s makeup looks like on a pale, blonde girl…then keep on reading!

Here is the picture I drew my inspiration from, for reference.

kylie jenner


Kylie Jenner 051

First off, I applied my base.  I wanted to look slightly “dewy,” so I used L’Oreal’s Magic Lumi Light-Infusing Primer and True Match Lumi foundation.  For concealer, I used my Pur Disappearing Act in “Light.”  I set it all with corn starch.  Yes, corn starch.  Read my earlier posts to learn more about my love for it.


Kylie Jenner 052

I used my Naked Basics 2 pallet for the eyes.  Although it’s not my favorite product, the colors were perfect for recreating her look.  For the lid, I mixed the colors “Skimp” and “Stark.”  I also used “Skimp” as a brown bone highlight.


Kylie Jenner 054

To blend out the crease, I used “Primal.”


Kylie Jenner 055

I applied “Cover” to my lower lash line.


Kylie Jenner 056

Looking through pictures of Kylie, I saw that she varies quite a bit with her liner.  Sometimes she doesn’t use any, and other times she wears an extreme cat eye.  For this particular look, it seems that she just extended her liner slightly.  I used Lorac’s Front Of The Line liquid liner in “black” to do so.


Kylie Jenner 060

I wish I would have had access to false eyelashes tonight, but sadly I didn’t.  Instead I just packed on the mascara and curled the heck out of my lashes.  I used L’Oreal’s Telescopic Shocking Extensions for length and Urban Decay’s Perversion mascara for volume.


Kylie Jenner 061

To finish up the eyes, I applied Ulta’s black gel eyeliner to my upper water line and a white pencil eyeliner to my lower water line.


Kylie Jenner 066

Can’t forget the Kylie brows.  She (or her makeup artist) is amazing at executing the ombre brow, where it gets more defined as you reach the outer tip.  I’m not an eyebrow expert, but I did my very best!  I used my trusty Anastasia Brow Wiz in “taupe” for this part.


Kylie Jenner 069

Our face shapes are so different, but to slim my cheeks, jaw, and nose I had to do a little contouring.  I used a flat Sonia Kashuk brush and Too Faced’s Chocolate Soleil’s Bronzer to chisel out those areas.


Kylie Jenner 074

Here’s what it looks like blended out.  I added some more warmth to the outer areas of my face with the same bronzer and a fluffy brush, as well as adding more to my cheeks.  The bronzer also took the place of any blush, as it doesn’t appear she’s wearing any in the picture.


Kylie Jenner 078

The final steps is, of course, the lips.  Now, I wish I had her beautiful lips..but I don’t.  She has more Angelina Jolie lips and mine are more Lucille Ball.  But still, I did my best to slightly overdraw them so they would mimic the fullness of hers.  This lipstick is totally one I could see her owning.  It’s the Lorac Pro Matte Lip Color in “Mauve.”

Here is a close up of the finished look:


Kylie Jenner 099

Too close?  Oh.  Well, here are some more for you.  So picky…


Kylie Jenner 096 Kylie Jenner 095 Kylie Jenner 093 Kylie Jenner 088


unnamed

Thanks for reading and stay weird!

-Rachel


Leave a comment

Elsa (Frozen) Makeup Tutorial

I think we can all agree that America can “let go” of the Frozen obsession.  See what I did there?  I made a pun.  You know, because the song from Frozen is “Let it…Go…”  Anyway, I’m sure you get it.  If you’re a parent, I’m pretty sure Frozen has played out its welcome in your household and car.  But despite all that, little girls everywhere are going to adorn themselves in blue sparkles and blonde wigs tomorrow evening and stuff their faces with candy to their little heart’s delight!  How awestruck would they be if you came to the door also dressed as Elsa?  You would literally become the ice queen in their eyes.  There’s a chance you could wrangle them all up and create a tiny Elsa minion army to do your bidding.  No?  Too far?  Alright, now that I’m positive you’re hooked (or at least a little curious), watch me transform myself into icy royalty.

1. Start with a flawless face.

October Favorites Elsa Tutorial 056

2. Apply purple eyeshadow to the main part of your lids, as well as your lower lash line.

October Favorites Elsa Tutorial 068

All the shadows I used are from a large, $10 Elf palette I purchased a few years back.  I mixed these two purples together, but any similar colors will do!

3.  Blend out the crease with an orange-ish pink.

October Favorites Elsa Tutorial 059

October Favorites Elsa Tutorial 060

Again, I mixed these two colors together to create the perfect shade.  Work with what you have!

4.  Highlight your brow bone with a matte white.

October Favorites Elsa Tutorial 061

Your eyes should look a little something like this now:

October Favorites Elsa Tutorial 072

Check out that awesome zit I have below my eyebrow.  Nice, huh?

At this point, I stopped taking step-by-step pictures.  Next, smoke out the upper and lower lash lines with a black pencil eyeliner.  I then tight-lined my upper lash line with that same black liner.  Apply a white eyeliner to your lower water line.  After a generous amount of mascara, your eyes are done!

For the rest of the face, I used the following:

October Favorites Elsa Tutorial 099

The remainder of the makeup is pretty straight-forward.  To recreate Elsa’s lips, use a bright pink lipstick.  For the cheeks, apply the blush on (mainly) the apples of your cheeks, blending out slightly.  Fill in your brows so they have her slight, cartoon-y arch.

Luckily, my new blonde hair was easy enough to style similar to hers.  I just curled the front section and fashioned it into a side braid, leaving out a few wispy pieces here and there.

AAAAAAND, here is the finished look!

elsa

I know, I did a really good job.  I mean spitting image, right!?  Alright, you caught me…

Here’s my take:October Favorites Elsa Tutorial 084 October Favorites Elsa Tutorial 081 October Favorites Elsa Tutorial 095 October Favorites Elsa Tutorial 096

October Favorites Elsa Tutorial 076 Let’s not talk about my outfit.  I threw on something light blue and purple.  I realize the awkwardly draped scarf was not a win here.  Anyway, I hope you enjoyed my last Halloween tutorial of 2014.  Enjoy your All Hallows Eve shenanigans!

Stay weird!

-Rachel


1 Comment

Creepy Ventriloquist Dummy Tutorial

Halloween is just around the corner, and I know that sexy costumes are all the rage these days.  Sexy doctor, sexy fireman, sexy nurse…you name it!  The only problem is, they have all been done before.  I mean, talk about unoriginal!  Ladies, have I got you covered because I can guarantee you that nobody has ever tried to dress up as a sexy ventriloquist dummy!  Ha!  You’ll be the talk of the party, for sure!  You can thank me after this quick tutorial…

1. Make your face GHOST white.  This was not hard for me to achieve.

Ventriloquist 002Oooh!  So hot already!

2. Apply light blue eyeshadow on your lids, blending out through the crease.  Then, make a rounded shape with your eyes using black eyeliner.  Leave a space between the lower eyelashes.  Fill in the negative space with white, including the lower water line.

Ventriloquist 008Sultry!

3. Fill in your eyebrows, unnaturally, using a brown liquid liner.  Round the front of the brow and taper to a point.

Ventriloquist 011Ow ow!!

Ventriloquist 012

4. Carve out your nose, cheeks (especially apples), and smile lines using grey eyeshadow.  Also, shade around your temple, hairline, and jaw using the same shadow.  Apply a pink blush in a circle on the apples of your cheeks.

Ventriloquist 013 Ventriloquist 015 I can feel the other girls getting jealous…

5. Create a creepy sultry over-drawn pout with red lip liner.  Ventriloquist 026 Ventriloquist 027

6. Lastly, add your finishing touches!  This includes your freckles, fake hair, and moveable jaw lines.Ventriloquist 030 Ventriloquist 034 Ventriloquist 042 Ventriloquist 043Simply ravishing!  Good luck fighting the fellas off with this getup!  Anyway, I said you could thank me after the tutorial…so, you’re welcome.

I actually used to have a dummy when I was a kid.  I went through a weird stage (one of many) where I wanted to be a ventriloquist.  My parents got me Lester, the dummy, for Christmas one year and I practiced with him every night.  I was actually getting pretty decent at my act until this one fateful day when I read a certain Goosebumps book called Night of the Living Dummy.

N11665

It was about a kid who found a dummy that came alive at night and tried to kill him and his family.  Fantastic reading material for a 10-year-old.  Well, after that…Lester had to go.  I couldn’t handle his creepy gaze from atop my bookshelf any longer!  R.I.P, Lester.  I was such a strange child…

Well, anyway, I hope you found this tutorial useful.  Psh, who am I kidding?  You’re going to love this costume!  Happy Halloween, sexy mamas!

Stay weird!

-Rachel


1 Comment

4-Year-Old Makeup Artist

I had the idea today to let my 4-year-old do my makeup.  He loves art and is always trying to get his hands on all the colorful things in my collection.  Little did I know, I had been raising a tiny prodigy.  His work is more on the editorial/runway side of the spectrum rather than the commercial side.  He chose to do a bold, blue eye paired with an autumn berry lip.  So vogue.

artist5

artist4

artist3

I feel these pictures do not do the finished look justice, but at least you have a little glimpse of his masterpiece.

I was lucky enough to get my picture taken with the artist afterwards.  I’m honored and humbled that he took the time to pose with me.  He is a busy, busy little man, after all.

artist2

I did get the whole process on video.  So if you’d like to watch the art unfold, then click the link below.

https://www.youtube.com/watch?v=_YyjGMiFsIc

Warning:  WORST video quality EVER.  Sorry.

Enjoy!


Leave a comment

Mega Lashes and Marital Clashes

While growing up, I always had this strange habit of making weird faces at people.  In fact, I still do.  I like to see just how ugly I can get my face to look.  My mom used to try and scare me by using the old cliche, “If you keep making that face, it’ll get stuck that way!”  I didn’t care.  I lived on the edge.  The wild side, if you will.  I’m honestly not sure why I do it, other than the fact that I find it hilarious.  But I was thinking today…what if my face actually got stuck in one of my grotesque expressions?  Like THIS:

tarte4Or THIS:

tarte5I’m just saying, that would be pretty intense.  Do you want to know an evil little secret?  I get extreme satisfaction out of terrorizing my poor, sweet husband.  Sometimes, if I’m the first one awake, I like to throw one one of these contorted looks and wait for my husband to wake.  That way, THAT’S the first thing he sees.  MUAHAHAHAHAHA!  Living with me is a complete nightmare joy, I’m sure.  I’m lucky he loves me as much as he does.

Ok, enough dilly-dallying.  On to the point of this post!  I have found my holy grail when it comes to my eyelashes.  I bought this combination a few weeks ago, and I honestly don’t know where it’s been all my life.  Well, it’s been at the store..but I just didn’t know about it.  It’s Tarte’s Picture Perfect Eyelash Curler ($19 at Tartecosmetics.com) and accompanying mascara, Lights, Camera, Flashes ($23 for full-size at Tartecosmetics.com).

unnamed

They. Are. AMAZING!  I wasn’t sure how I felt about the mascara at first, but I’ve grown to love it!  It plumps up my lashes in one coat, and definitely adds a good amount of length.  The best part about it is how it applies-smoothly and evenly and without clumping.  I feel it’s quite hard to find a decent volumizing mascara that doesn’t get “blobby.”  That’s not a word.

tarte3Now, on to the lash curler.  I always figured that every eyelash curler basically did the same thing.  I never thought that one could outperform the other.  I was wrong.  Tarte’s Picture Perfect Eyelash Curler evenly curls every single lash.  It doesn’t tug at my lash line, and it doesn’t take much pressure on the handle to achieve a decent curl.  My old lash curler seemed to unevenly “kink” my lashes instead of curling them.  I also had to go over each eye repeatedly with the tool to get the look I desired.  I’m honestly so thrilled.

tarte2Here are some before and after pictures:

No mascara.

No mascara.

No mascara.

No mascara.

After curling/Lights, Camera, Flashes.

After curling/Lights, Camera, Flashes.

After curling/Lights, Camera, Flashes

After curling/Lights, Camera, Flashes.

After curling/Lights, Camera, Flashes.

After curling/Lights, Camera, Flashes.

Mind you, this is with one coat of mascara.  Good job, Tarte!  I’m impressed!  Also, I think it’s ironic that I’m wearing a Benefit “They’re Real” shirt in these pictures.  Oh, the irony!  Anyway, give this combo a try the next time you’re at Ulta or Sephora.  Or skip the wait and go to tartecosmetics.com!  You won’t be disappointed.

Stay weird!

-Rachel

tarte6